
Frequently Asked Questions- Lecturers
Frequently Asked Questions- Lecturers
Starting with Moodle
What is Moodle?
Moodle is a learning management system Moodle is an acronym for "Modular Object-Oriented Dynamic Learning Environment. It is an online educational platform that provides custom learning environments for students. Educators can use Moodle to create lessons, manage courses, and interact with teachers and students. Students can use Moodle to review the class calendar, submit assignments, take quizzes, and interact with their classmates.
How do I access Moodle?
To access the Moodle Virtual Learning Site go to elearning@buse.ac.zw/8043/moodle
Or
Open the Bindura University of Science Education website, go to www.buse.ac.zw , then click on Students then select Virtual Learning Portal
How do I log in into Moodle?
Once you have opened Moodle to your far left enter your username and password and click on login.
What if I have forgotten my username or password
Click on Lost password, then enter your username then click search, and if you entered a correct username an email will be sent to your email with instructions to follow
Or
Click on lost Password, then enter your email address and if you have entered your email correctly a message will be sent to your email with instructions to follow
Or
Log into the Bindura university of Science of Education, go to www.buse.ac.zw, then scroll down on the website and click on ICT Desktop, then click on the link that is entitled Support Center, then after the Help desk system has opened click on Open a New Ticket , then fill in the relevant details including the challenge you are facing and after you have finished click on Create Ticket, then an email will be sent to you with instructions to solve your challenge.
Or
Get in touch with the Centre of Educational Technologies, Innovation and Design on the following email cetid@buse.ac.zw or call on +263782708523
What age of learners and educational settings is Moodle most appropriate for?
Moodle can be and is successfully used from early years of Primary schools (examples here) through to the Secondary sector (examples) and universities worldwide. Moodle can be adapted to suit learners of all ages in any learning environment, including commercial training.
Is Moodle just for online learning?
It can be. However, in most cases Moodle is used to support and combine face-to-face interaction with e-learning, m-learning and other forms of learning.
Where can I get some tutorials or presentations about Moodle?
Get in touch with the Centre of Educational Technologies, Innovation and Design on the following email cetid@buse.ac.zw or call on +263782708523 to get tutorials , for beginners called Moodle for Beginners and for Chairpersons called Manager role on Moodle.
How do i add an assignment in Moodle?
On your course page, click Turn editing on (top right). Editing icons and links will appear.
Locate the Section where you want to add the assignment. (If you are using the collapsed topics format, open the Section.)
At the bottom-right of the Section, click + Add an activity or resource. The Activity Chooser will open.
In the Activity Chooser, select Assignment and click Add. The Adding a new Assignment page will open.
Configure the assignment options. The page opens with General, Availability and Submission type settings in view. Click topic headings to make additional settings for submission types, grading, groups, etc., or click Expand all (top right) to view all possible settings. For more information on these options, see Configure Assignment Options for Moodle (below), or click the help icon (
) next to any option.
Click Save and return to course to return to your main course page, or Save and display to view the assignment page.
How do i edit an Assignment?
While it is possible to edit the content or setup options for an existing assignment, proceed with caution if the assignment has already been released to students -- especially if students have already submitted work. Changing some options, such as changing participants when working with groups, may result in student confusion and the loss of work that has already been submitted.
To change the content or options for an assignment you have already created:
On your course page, click Turn editing on.
Next to the Assignment to update, click Edit, then select Edit Settings. The assignment's settings page will open.
The Updating Assignment page shows you the same options available on the Adding a new Assignment page. Here you may change your assignment options as needed, including changing the due date, grading information, and availability of the assignment.
Once you have finished making the necessary changes, click Save and return to course at the bottom of the page.
How to Download Selected Submissions
Instead of downloading all student submissions, you can choose to download selected student submissions to a .zip file.
On your course page, click the name of the assignment activity. The Assignment page opens and displays the description of the assignment and a summary of submissions.
Below the summary, click View/grade all submissions. The Submissions page will open.
For each submission you would like to download, click the checkbox to the left of the student name.
Below the table of submissions, for With selected... click Choose and select Download selected from the drop-down menu.
Optional: By default, submissions may be downloaded in folders. Each submission is put in a separate folder, with the folder structure kept for any subfolders, and files are not renamed. To disable this, unselect Download submissions in folders
Click Go. This will generate a prompt asking you to confirm that you want to download selected submissions.
On the prompt, click Ok. This will begin the download.
The .zip file will download according to your browser and computer settings. Locate and unzip the .zip file.
All files will automatically be renamed with students' names prepended.
For online text submissions, you will receive an .html page for each student's online text submission. You can open this in a browser or in a word processing application such as MS Word.
For file submissions, you will receive the file type submitted by the student.
How to Download All Submissions by students
On your course page, click the name of the assignment activity. The Assignment page opens and displays the description of the assignment and a summary of submissions.
Below the summary, click View/grade all submissions. The Submissions page will open.
Above the table of submissions (upper left), click Choose and select Download all submissions from the drop-down menu.
Submissions will automatically download to your computer as a .zip archive.
The .zip file will download according to your browser and computer settings. Locate and unzip the .zip file.
All files will automatically be renamed with students' names prepended.
For online text submissions, you will receive an .html page for each student's online text submission. You can open this in a browser or in a word processing application such as MS Word.
For file submissions, you will receive the file type submitted by the student.
How do i create a quiz?
To create a quiz, first create the quiz shell, then add questions to the shell, either creating them as you go or using existing questions in the course question bank.
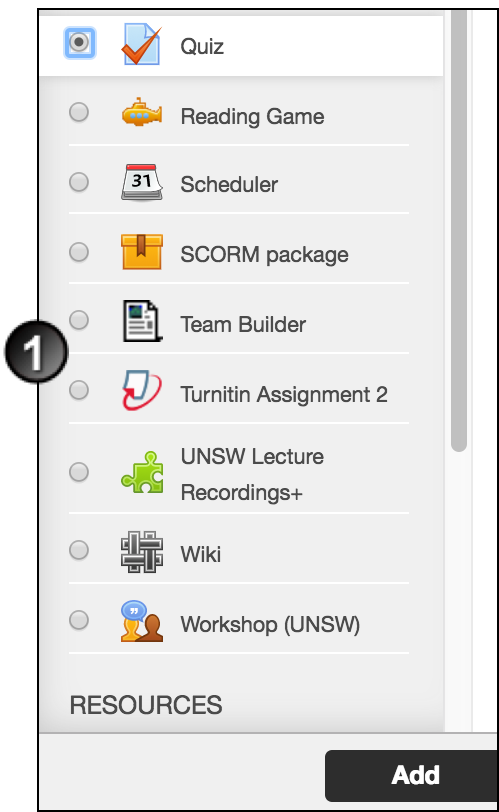
On the Moodle course home page, in the relevant section, click Add an activity, select Quiz from the list and click Add.
On the Adding a new Quiz page, click Expand all at the upper right of the page.
In the General section, enter a Name, and an introductory Description if necessary.

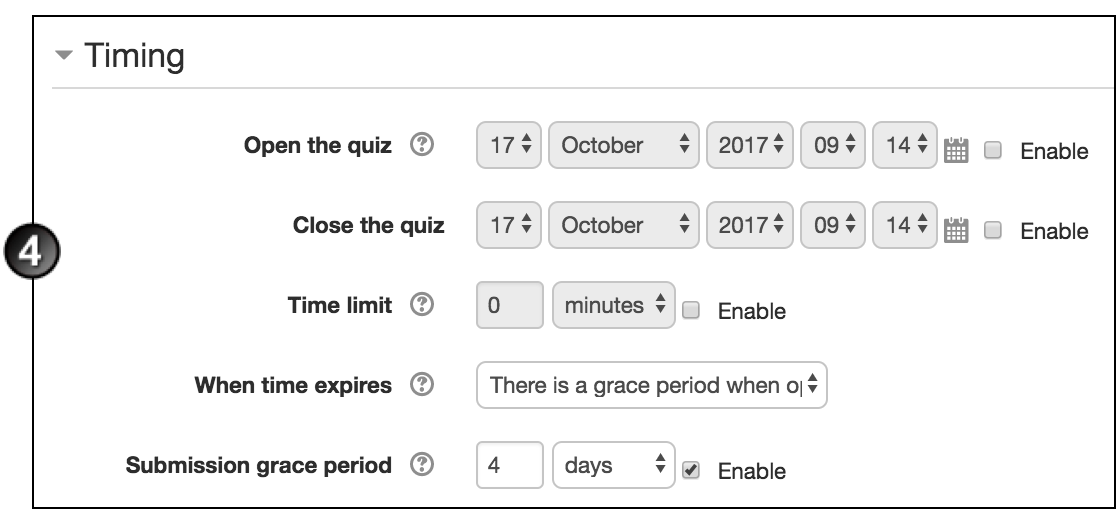
In the Timing section:
Enable and select dates to Open the quiz and Close the quiz.
Enable and set a Time limit, if using.
Select the appropriate option for When time expires.
If you are allowing a grace period, Enable and nominate a Submission grace period.
In the Grade section:
Select the Grade category within the Gradebook where you want this assignment to belong.
Set the number of Attempts allowed, the Grade to pass and, if multiple attempts are allowed, which Grading method Moodle should use.

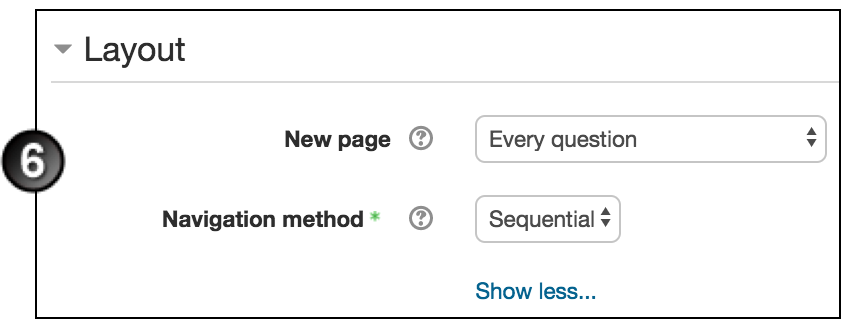
In the Layout section:
Select where you want New page breaks to fall.
Click Show more and select, at Navigation method, whether you want Moodle to force students to answer questions sequentially.
In the Question behaviour section:
Select whether to Show question names in Quizzes.
At Shuffle within questions, select whether you want multiple choice or matched question options randomized.
Select How questions behave. Deferred feedback (students must submit entire quiz before they see any grade or feedback) and Interactive with multiple tries (students submit each questions and get immediate feedback as they progress through the quiz) are the most common choices.
If you allowed multiple attempts, click Show more and select whether Each attempt builds on the last, if you want each new quiz attempt to contain the results of the previous attempt. This allows students several attempts to complete a quiz.
Depending on your selection for How questions behave, you may choose whether to Allow redo within an attempt.

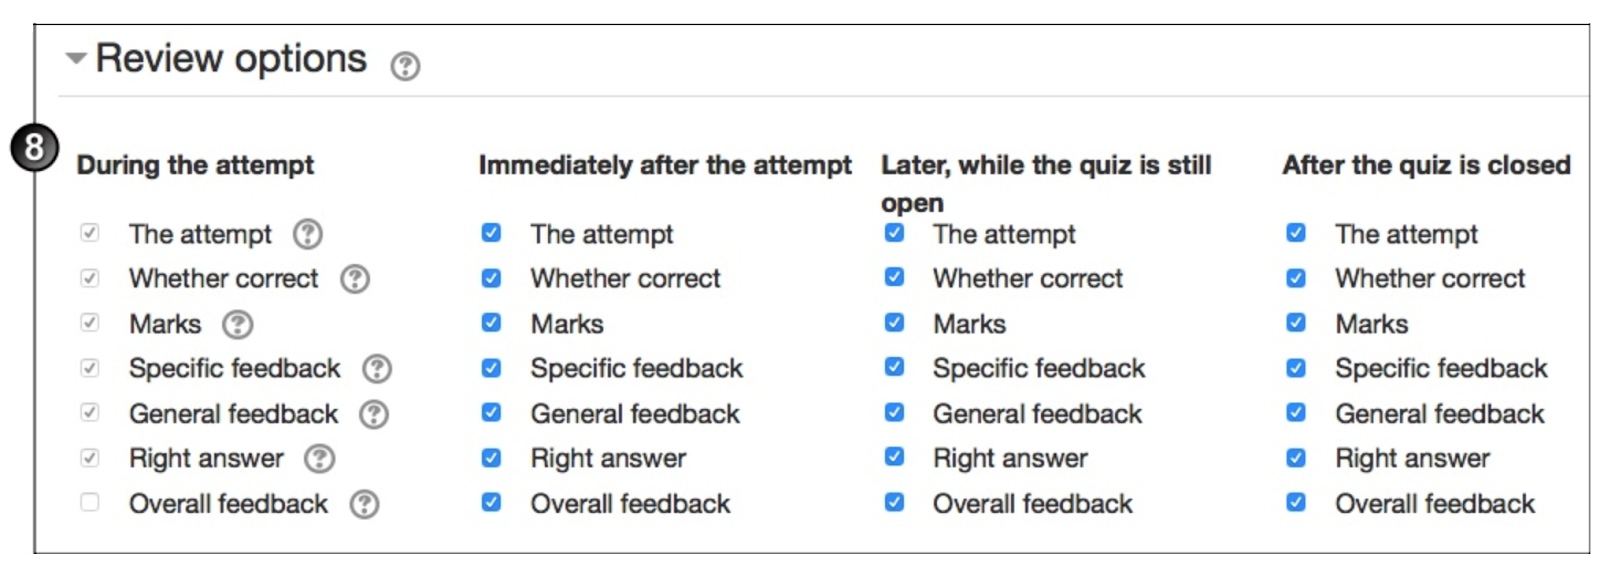
Under Review options, select what you want the student to be able to see when they view their attempt or report at various stages.
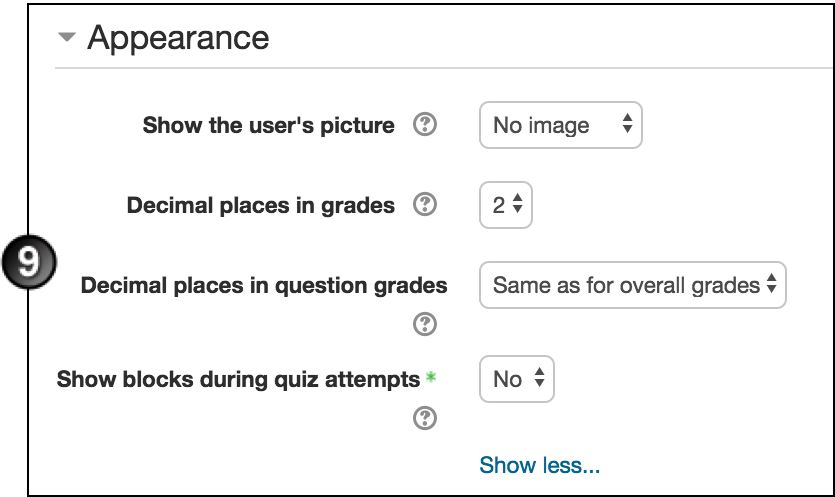
In the Appearance section, make choices about how you want the quiz to display:
Do you want to Show the user's picture during the attempt, and on the review screen, to make it easier to check that they are logged in as themselves in an invigilated exam?
How many Decimal places in grades do you want to display to the students for this quiz?
How many Decimal places in grades do you want to display to the students for individual questions in this quiz?
Click Show more and select whether you want the normal blocks to display during the student's quiz attempt.
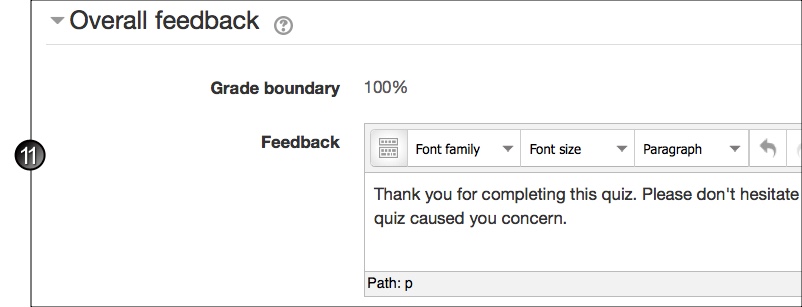
Overall feedback: Enter the Feedback text the students will automatically see, depending on which range of scores they fall within, as defined by the grades or percentages in the Grade boundary fields.
Complete any other necessary page sections, then click Save and display to access the page for adding questions to the quiz.
For assistance adding questions to the quiz, see the instructions below and this MoodleDocs page.
Adding questions to a quiz
You can add questions to a quiz in 3 ways:
create them one at a time within the quiz
retrieve them from a question bank
import them from a file on your network or computer, or from one of your uploaded course files
How to create questions one at a time within a quiz:
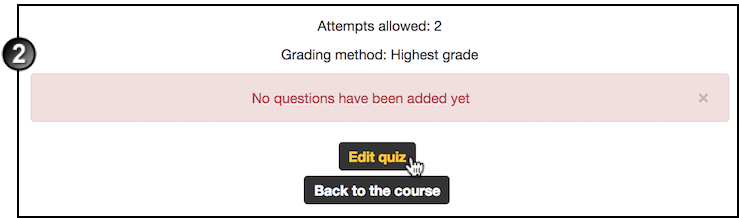
On the course home page, with editing turned on, click the link for the quiz.

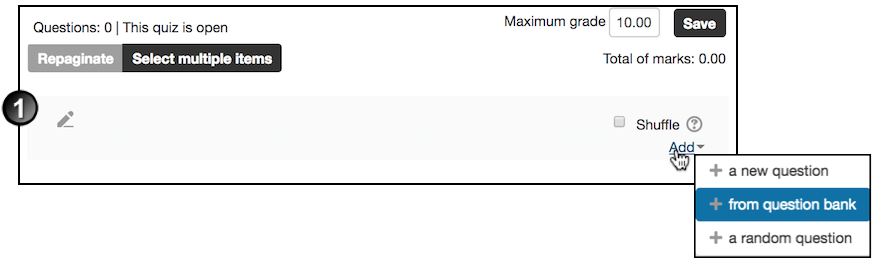
On the quiz's home page select Edit quiz.
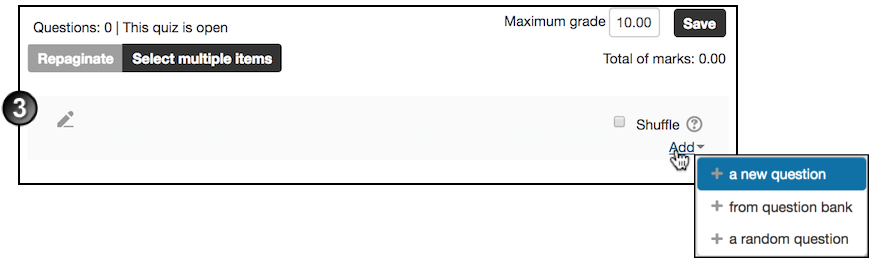
On the Editing quiz page, click Add and then select a new question.
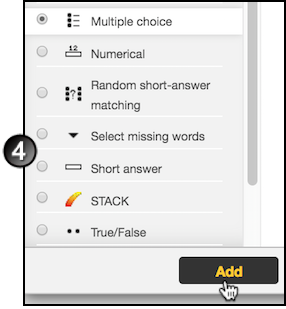
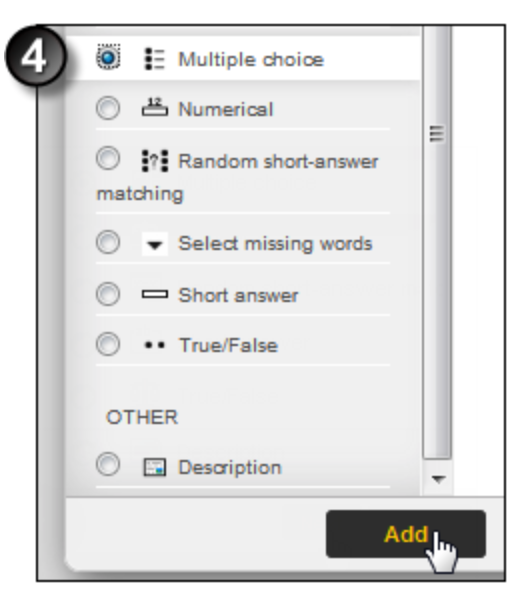
In the Choose a question type to add window, select the question type and click Add.
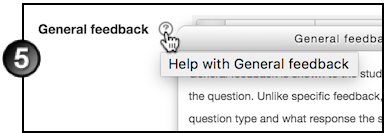
On the Adding a [question type] question page, select a question Category, enter a Question name, some Question text and the Default mark, and then complete the remainder of the fields as required, clicking Help
for assistance if necessary.

Multiple choice question with multiple answers allowed: When you set up the answers for a question of this type, not only must the questions' combined Grade amounts add up to 100%, but you must also assign a negative Grade for the incorrect answers. If you don't, a student who selects incorrect answers as well as all the correct answers will be marked as if they answered the question correctly.
If the question is complex and you want to check how it will display to the student, scroll to the bottom of the page and click Save changes and continue editing. Then:
Click Preview, and the question will display in the Preview question window.
If necessary, adjust the Attempt options and click Start again with these options to see how the revised question behaves.
If necessary, change Display options and click Update display options to check the display.
Close the window when you are happy with the way the question behaves.

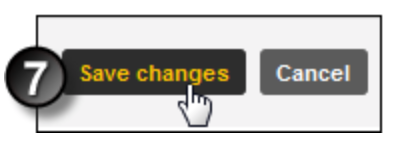
Click Save changes. The question displays on the Editing quiz page. Click the arrows
to change its position within the quiz.

How to retrieve questions from a question bank:
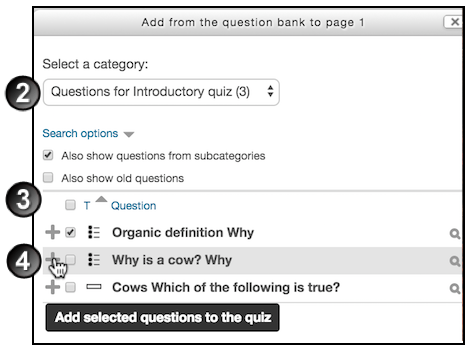
On the Editing quiz page, click Add and then select from question bank.
Make your choice from the Select a category list.
Select the check box(es) of the question(s) to be added to the text.
Click the + icon next to the check box to add a single question, or click Add selected questions to the quiz to add multiple questions to the quiz. The questions are added to the quiz.
You can also add random questions from the chosen category to the quiz.
Click here for more detailed instructions on using question banks.
To import questions:
On the course home page, in the Settings block, select Course administration > Question bank > Import.

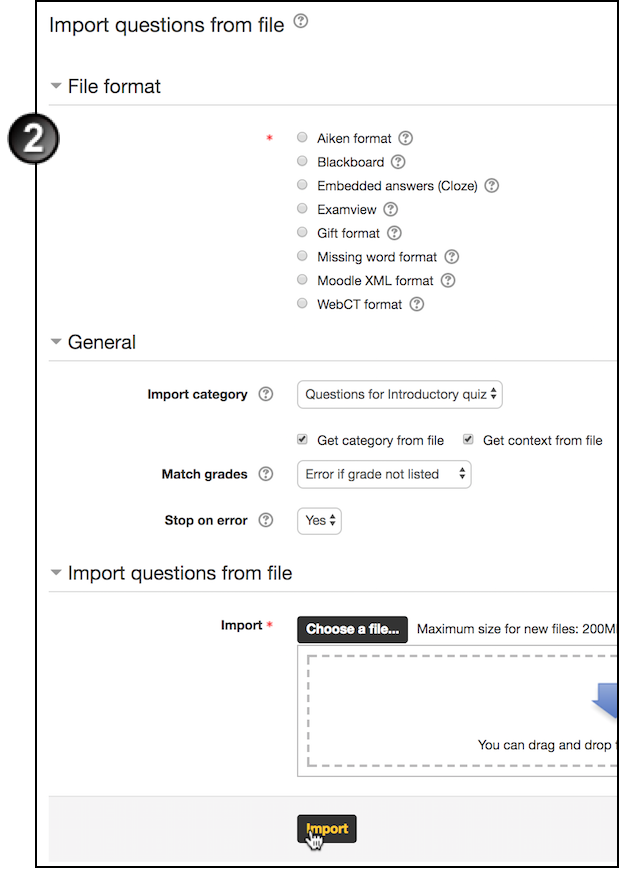
On the Import questions from file page:
Select the File format.
Complete the General fields as desired.
Choose a file to import.
Click Import.
How to add a question to a question bank
Every Moodle course comes complete with a question bank, where all questions created for the course are stored. To add questions to the bank:
On the course home page, in the Settings block, select Course administration > Question bank > Questions.

On the Question bank page, from the drop-down list, Select a category you want to add a question to. You can also select whether and how questions already created for that category display.
Click Create a new question.

In the Choose a question type window, select the question type and click Add.
On the Adding a [question type] question page, complete the question, answer and feedback fields as required, clicking the Help button
for assistance if necessary.
If the question is complex and you want to check how it will display to the student, scroll to the bottom of the page and click Save changes and continue editing. Then:
Click Preview, and the question will display in the Preview question window.
If necessary, adjust the Attempt options and click Start again with these options to see how the revised question behaves.
If necessary, change Display options and click Update display options to check the display.
Close the window when you are happy with the way the question behaves.
Click Save changes. The new question displays, highlighted, on the category page.
How to Add and edit question bank categories
To start with, each course's question bank contains a single, 'Default' category. Create more, to make it easier to find questions, and to enable you to use random questions and matching questions more easily.
Within the course question bank, you can create hierarchies of parent categories and subcategories.
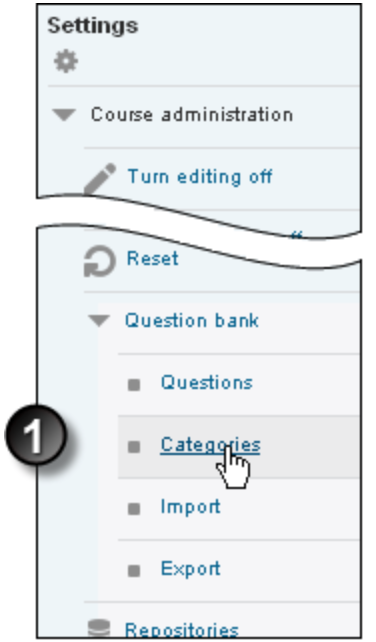
On the course home page, in the Settings block, select Course administration > Question bank > Categories.
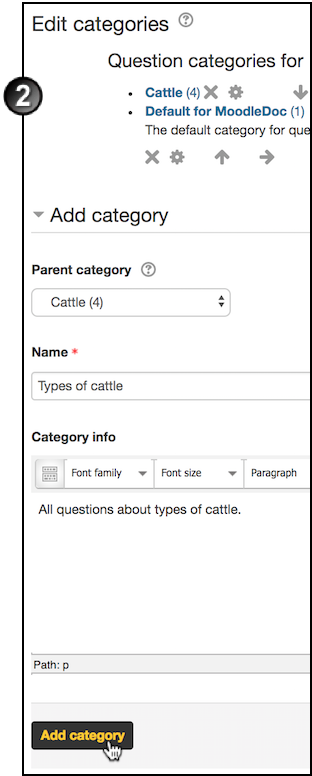
On the Edit categories page:
Select an appropriate Parent category from the drop-down list. Select Top to make this new category a top-level category.
Enter a Name for your new category.
Enter any Category info that will be useful for users compiling quizzes.
Click Add category. The new category displays in the list at the top of the page.
To edit the new category, click the Edit this category icon
next to the category's name.

On the Editing a category page, change the Parent category, Name and Category as desired, and click Save changes.

How to reactivate a quiz
To reactivate a quiz that has passed its close date:
Click Turn editing on
.
Click Edit next to the quiz, and select Edit settings from the dropdown.

On the Update quiz page, click open the Timing section and change the date in the Close the quiz fields to the new, extended close date.

How to view quiz reports
To access reports relating to a quiz:
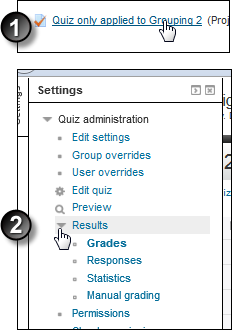
On the course home page, click the quiz's link.
In the Settings block, click Quiz administration > Results.
Select from the list of the 4 types of reports available: Grades, Responses, Statistics or Manual Grading.
Grades
The Grades report tells you about student quiz attempts, displaying the overall grade, and a summary of each correct/incorrect answer. It also reports on the State (student progress through a quiz), the time the quiz was started/completed and the total time the student took to complete it. You can re-grade quiz attempts by selecting Re-grade selected attempts. A bar graph summarises the grade range and frequency.
Responses
The Responses report is visually similar to the Grades report, but it shows the responses students gave to quiz questions, not the marks they earned. You can view the question text/correct answer to compare students' responses.
Statistics
The Statistics report provides statistical ("psychometric") analysis of the quiz and the questions it contains. The report is divided into 3 sections:
a summary of the whole quiz
an analysis showing all questions in table format, and
a bar graph of the percentage of correct answers (the "Facility index") and the "discriminative efficiency index".
If I have challenges in accessing or using Moodle where can I get help
Get in touch with the Centre of Educational Technologies, Innovation and Design on the following email cetid@buse.ac.zw or call on +263782708523, or you can come in person to our offices at The Faculty of Science Education Complex office number F13, second floor, you can also book for one on one sessions or workshops.
Are there any provisions in Moodle for people with disabilities?
Certainly Moodle supports many assistive technologies such as screen-readers, screen-magnifiers, alternative mouse and key use, disabling of AJAX and Javascript, and more.
How do I get around Moodle?
Use the Navigation block on the side of your page. From there you can go directly to any part of Moodle you have access to.
How do I edit things?
You can only edit things you have permission to edit. A regular user such as a student can only edit their My home page and possibly their profile page. A user with editing rights such as a Lecturer can use the 'Turn editing on' button or the link in the Settings block to edit items. A guest can't edit anything and an Admin you can whatever they like.
Who can create and edit activities and other things in courses?
Whoever has the editing capability, usually it is the Lecturer who creates and edits courses and activities within courses, but this role can be done by the Manager who is the Departmental Chairperson
Can Moodle be used in different subjects (like science, physics, mathematics, languages, art, media....)?
Yes. Moodle is used in a variety of fields. Users in some subject areas may benefit further from standard or compatible third-party modules and plugins (eg. in maths, Tex notation filter (standard) or DragMath equation editor (third-party plugin)).
How can i use Moodle to stimulate students think harder and ask good questions?
By asking and encouraging good questions students can wrestle with and explore through and with the help of activities, resources in a course. For example, open a forum discussion with a provocative question, start a wiki where groups collaboratively build a solution ... and more!
How can I communicate with students by using Moodle?
Many ways are available. Some examples include: Forums are great for extended conversations over time, Messages for private channels, Chat for synchronous conversations, and Comments for quick notices and remarks. You can also exchange online feedback with Assignment, comments to Blog posts ... and more!
How can we share resources with Moodle?
Moodle offers a number of ways to share content: making files and folders available to course participants, collecting resources of any kind with a Database, attaching files to Forum posts, importing and linking resources to and from external repositories/portfolios ... and more!
How can Moodle help people collaborate?
Use different activities like Wikis to create content together, Forums and Comments to exchange ideas, Database to collectively gather resources, Glossary to create shared understanding of concepts ... and more! You can group students in any of these activities to promote collaboration.
How do I grade in Moodle?
Grades can be created for each activity in a course which are then added to the Gradebook. For example, grades in Assignment (all types), Quiz and Workshop activities are automatically added to Gradebook. In some activities you will have to turn grading on, such as ratings 'on' in Forum, Glossary and Database to send them to the Gradebook. You can also use the gradebook to adjust, assign or automatically scale an activity grade in your course. For some activities which don't automatically link to the gradebook, such as Chat or Feedback, you have to create a new grade item manually. There are many ways you can give feedback to students on their progress in activities without giving them a grade. In Assignments for example, you can give written feedback.
Can students do self and peer assessment type tasks with Moodle?
Yes. Probably the best activity to do that is Workshop module. Informally, students can evaluate (and even rate) each others' Forum posts, Glossary entries, and Database entries.